PodPi High-Five Sensor!

Learn how transistor work by making this fun project!

To order the parts for this project, check out: High-Five Sensor Kit

Parts List

For this experiment you will need:

  • 1 mini breadboard
  • 1 NPN Transistor (BC548, 2N3904, etc.)
  • 1 LED
  • 1 330 Ohms resistor
  • a 4.5V-9V power source
 

STEP 1 - The Transistor

Place the transistor on the mini-breadbaord, with the flat side facing the middle of the breadboard. Transistors have a certain polarity and need to be placed and connected correctly. You can learn all about transistors in the PodPi Module 7.

There is no need to push the components too far in the breadboard. If you feel some resistance when pushing them inside, that should be far enough.


STEP 2 - The Light Emitting Diode

Place the LED across the middle of the breadboard. An LED is a Light Emitting Diode. It lights up when a current flows through it.

LEDs have a polarity just like the transistors. There is a positive side (the anode) and a negatve side (the cathode). The anode has a longer lead than the cathode. Make sure to place the short lead on the same row as the collector pin of the transistor.


STEP 3 - The Resistor

Place a resistor on the same row as the cathode of the LED and to another row on the breadboard.

A resistor is used to limit the current that flows through the circuit. If we omit the resistor, the electricity flowing into the LED would be too much and it would damage the LED. The resistor acts like a filter and only allows a small amount of electricity to flow.


STEP 4 - The Power Source

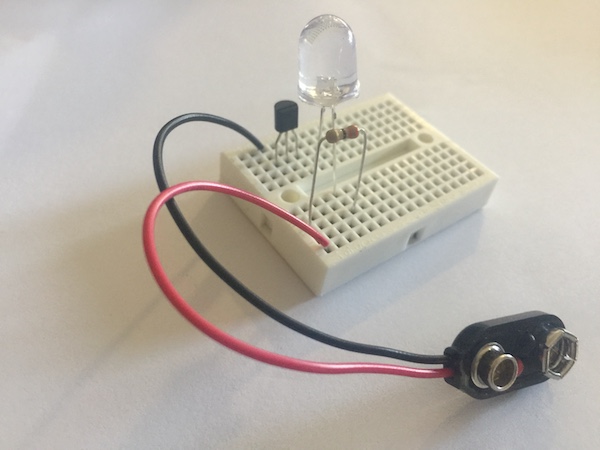
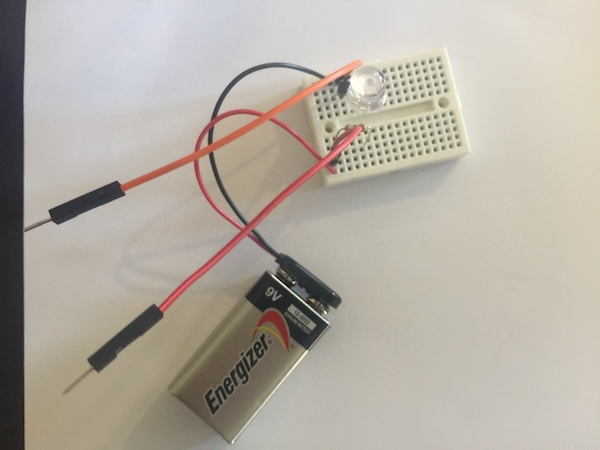
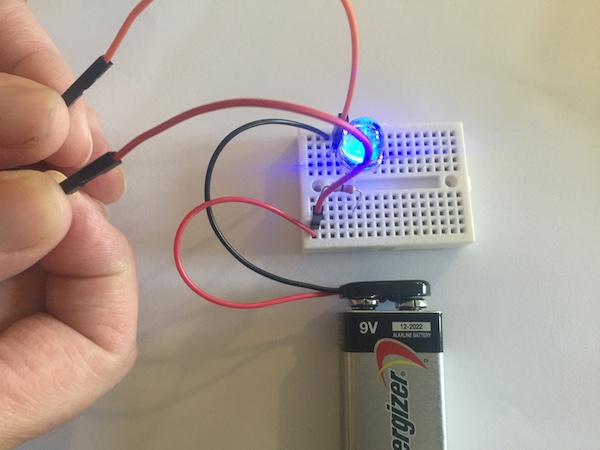
Just like any electronic appliance or circuit, you will need a poer source to power the circuit. In our case, we are using a 9V battery. You can use any other power source ranging from 4V to 9V.

You could also use a 3V coin cell battery, but the LED might not be bright enough to see. You can also use the power headers of an Arduino board that supplies a 5V and GND.

Connect the positive (red wire) to the resistor and the negative to the emitter pin of the transistor (see picture).


STEP 5 - Sensor Wires

Now add some sensor wires that you will use to trigger the LED.

  • Add a wire to the base of the transistor (middle pin) - this is the sensor wire
  • Add another wire to the positive side of the power supply (same row as the resistor and battery +)
 

Let's test it!

Your body will be used as a giant resistor. When you touch both wires (the sensor wire and the positive wire), as small ammount of current will flow through your body and will be amplified by the transistor. When this happens, the LED will light up.

Now, have someone else touch the sensor wire while you hold the power wire. High-Five your friend and see what happens!


Get to know the Pods

Pods are imaginary characters that live of the Island of PodPi. Meet your first two Pods below and discover new ones when you start your adventures. We have carefully designed and developed over 16 different Pod characters, each with a very unique personality, style and skillset relating to a physical component or technical concept.  These characters will engage students in ways that encourage them to learn, think and create. The Pods are colored based on the particular beach they belong to (green for Learn, blue for Create, etc.).

Meet Darling. Darling knows all about transistors. When you need to amplify small amounts of current, Darling is right there to help you out. She takes these small amounts of current and amplifies them for you. She also turns some signals on and off like a switch when you need to do it very quickly.

Meet Leddy. Leddy is the main artist on the Island of PodPi. You will find her mainly on the Create beach, where she lives. She is always creating something new and something colorful. While she has great ideas, she needs your help and the other Pods' help to bring her creations to life. She represents the technology behind the magic of LEDs. Think of the Create beach as the Island's own Makerspace.

Follow us on Instagram

Check out some of the projects, lessons and what other subscribers and schools are doing on our Instgram page.

Send us your pictures to be featured on our feed as well. We love seeing what you do with the PodPi lessons. Simply email them to Stephane to be featured.

 
facebook twitter linkedin

Two Wires Lab © 2018
11230 Gold Express Dr. #310-136
Rancho Cordova, CA 95670